
 by creating of your own email newsletter")
Email was created cca 22 years ago, in 1993. Since then it has become standard in commercial communication. The Email newsletter is a great way how to deliver your message to the broad audience. If you are an Internet based entrepreneur, you should definitely consider creating one. It will help you to improve your business processes (ROI).
If you have no time to learn email marketing tricks, hiring an external agency is probably the best way, how to start to send a regular newsletter. Every solid provider of ad agency services will help you to get your email campaigns up and running. However, email newsletter is not a rocket science. If you love online marketing like me and have time to learning new things, you can do it yourself.
The ultimate thing you need to do is to find a strong email marketing tool you can work with. Basically, there are 2 options:
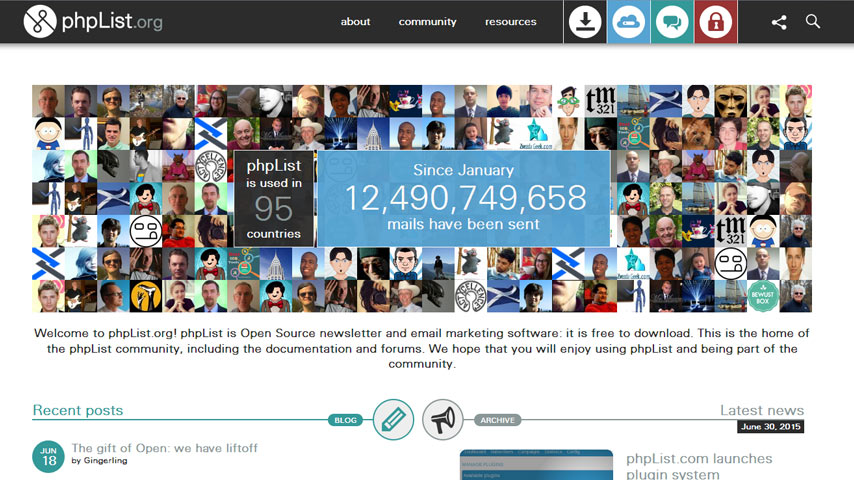
1. Install some open-source email marketing software such as PhpList. It runs on your our server, there are no license or subscription fees. Only costs you have are the cost of running the server. This solution has also few disadvantages:
- You spend your precious time with maintenance of another service
- You must have properly configured mail server (PTR, SPF record, DKIM, DMARC policy…) and there is still a big chance that your emails will end-up in SPAM folders simply because you are small (unknown to the big mailbox providers).
- Less marketing features, then a paid service.
2. Use some premium (paid) email marketing tool. I have on my radar few paid email marketing solutions such as Mailigen, MailChimp, and AWeber. Which email service try as first? I googled out this Quora question: “What do you prefer: MailChimp or Mailigen or Aweber?“
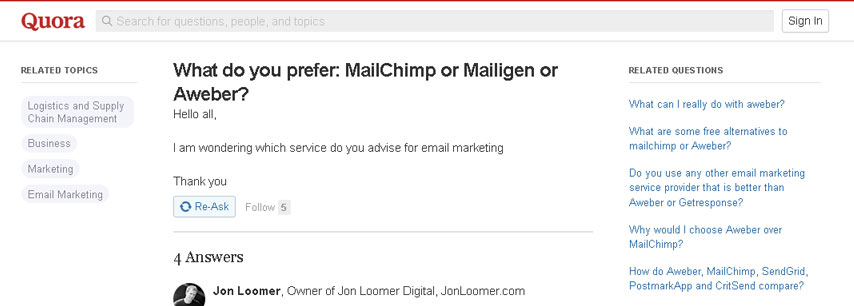
First one is rated AWeber. Its basic package (up to 500 subscribers) starts from $19/month. Mailigen and MailChimp want for a package of the same value $10/month. Second one is rated Mailigen and I like the Līga’s answer:
Mailigen because of its great new features – active RSS, dynamic content, text messaging marketing. Integration of different channels and methods in one marketing service is amazing. It’s far more than just email marketing.
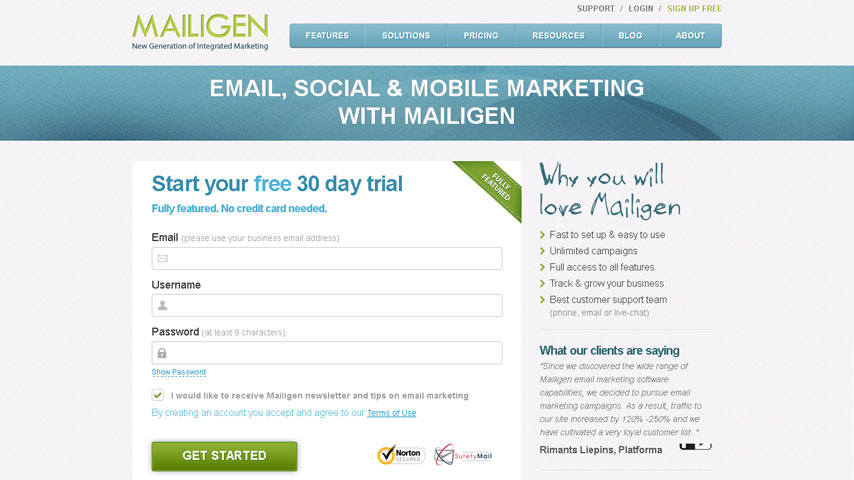
What is Mailigen?
This is from their homepage:
Mailigen is one of the most powerful tools available online. It allows creating beautiful, high-impact email campaigns straight from your browser with ease.
…and indeed, what I found is incredibly feature-rich email marketing SaaS:
- WordPress (WooCommerce), Magento native plugin (I have several WP sites)
- Subscription form which quickly integrates into any kind of website
- Social media integration, you can collect emails even through your Facebook fan page.
- Email preview for main mobile, webmail and desktop clients.
- RSS to email
- Real-time tracking and reports
- Responsive drag’n’drop WYSIWYG
- Simple contact management
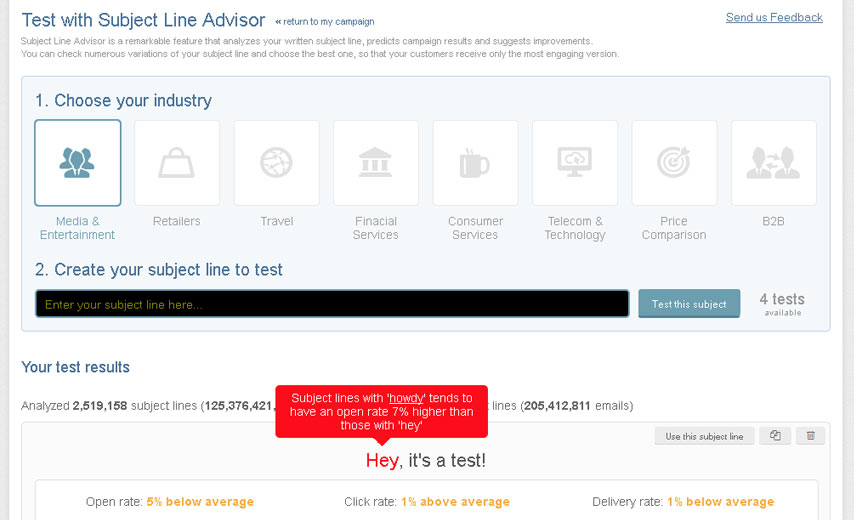
Mailigen constantly improves its components and that’s a philosophy I like. The company recently added another new feature called Subject Line Advisor (SLA). It analyzes the email subject and “instantly predict the open, click and delivery rate of email campaigns prior to being sent.“
Every time SLA runs, it analyzes and compares more than 2,500,000 subject lines (within 125,000,000,000 emails). In other words, Subject Line Advisor reduces annoying A/B testing.
So, let’s start. The first basic step is to start with a collection of email addresses.
How to install Mailigen Widget (email marketing plugin for WordPress)
Mailigen has a native WordPress plugin called Mailigen Widget, and of course, it’s easy to install:
1. Download the code and place it unzipped into wp-content > plugins directory.
2. Activate through the “Plugins” in the WordPress admin
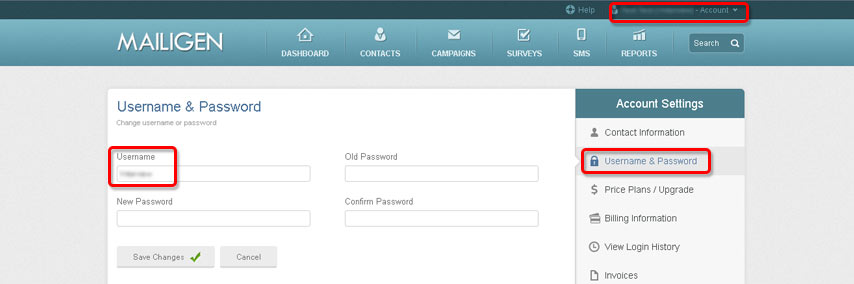
3. Connect module with your Mailigen account (“Settings” > “Mailigen Widget“). You will need to know your Mailigen username; in this case you cannot use email tied to the account as a login.

4. You can find your Mailigen username under “Account Settings” > “Username & Password“.
5. After successful synchronization Mailigen Widget will automatically create new API key + additional settings will be available. Choose a contact list, select input fields and hit “Save Settings” button.

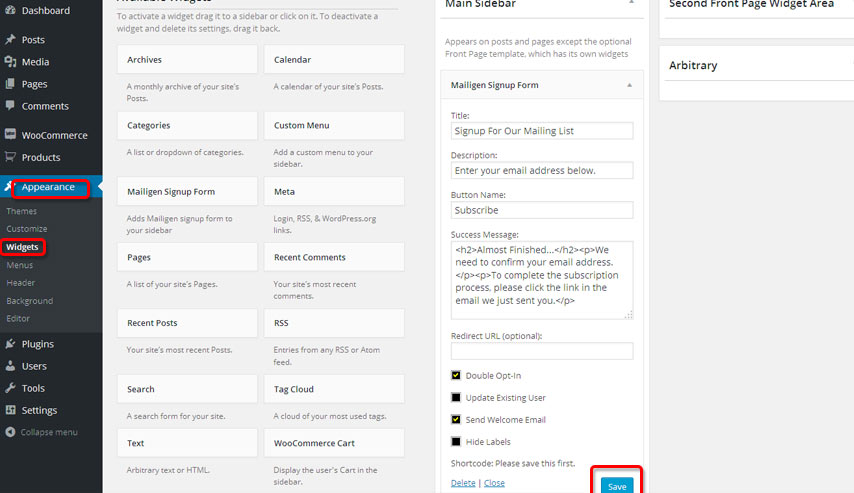
6. You are almost done. Last necessary thing is to drag the Mailigen widget into your sidebar (“Appearance” > “Widgets“) and you can finally start to collect the visitor’s emails.
NOTE: You can set up redirect URL where the user will be moved after the subscription. This is useful particularly when you “track the goals” with Google Analytics (article soon to come).
7. Congratulations, you have successfully set up your mailing list. When you refresh a homepage, you should see the subscription form in the sidebar. You can start to collect users’ emails now.
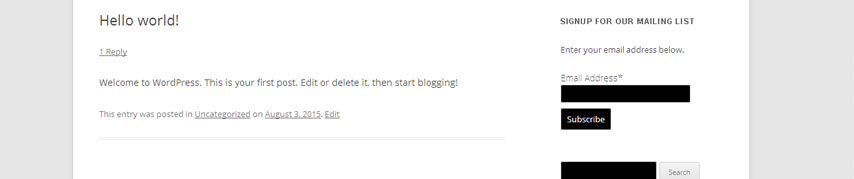
8. In my opinion, the best position to place mailing list form is right after a blog post. If user enjoyed the article, he or she will be more willing to subscribe for more. In Wodpress, any widget can be easily positioned with “shortcodes“.
To enable this feature, download and install plugin called Widget Shortcode. It adds a [widget] shortcode which enables you to output widgets anywhere you like i.e. at the end of the blog post.
The plugin automatically generates the code for every available widget. You can find it under “Appearance” > “Widgets“.

9. Go to your theme editor (“Appearance” > “Editor“) and with this code
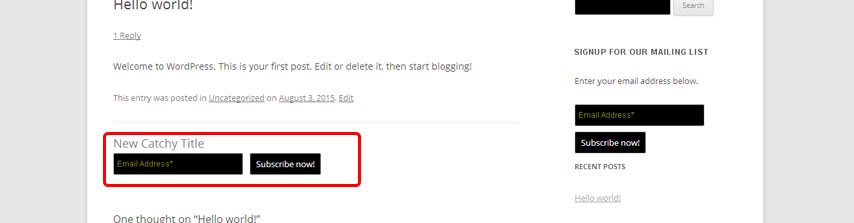
<?php echo do_shortcode('[widget id="mailigen_widget-3" title="New Catchy Title"]'); ?>edit PHP file responsible for rendering of the post (single.php). In my theme the best place was right above the <nav class="naw single">.

After a little modification of the CSS (which depends on your theme) you can see the result:
How to enable Mailigen newsletter sign-up form on any kind of website (Drupal, Joomla…)
This blog is made with Drupal. There’s also an unofficial Drupal Mailigen module. It’s only a sandbox project with last commit made on February 22, 2013. I tried to install it, but the code was not compatible with the actual Mailigen API.
How to enable Mailigen newsletter sign-up form on your website when there’s no module or your website has a custom code? It’s simple. Mailigen is really a robust email marketing tool and they prepared easily-done solution.
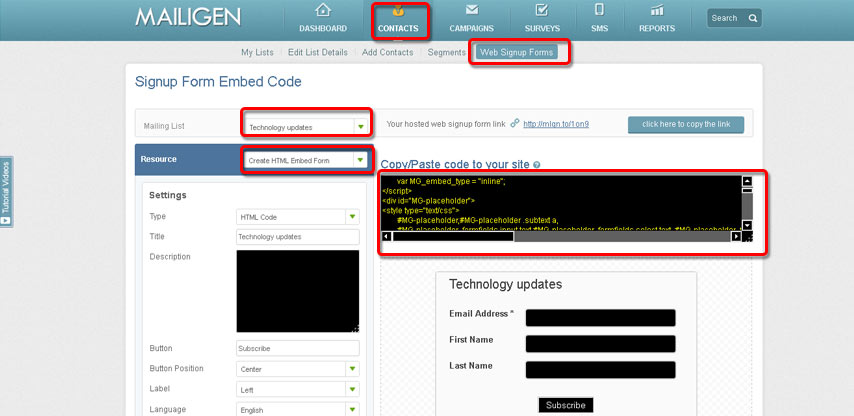
1. I assume that you have already created your newsletter (“Contacts” > “My Lists” > “Create New List“).
2. In your Mailigen account, go to “Contacts” > “Web Signup Forms“. In “Mailing List” choose a list you wish to work with. Under “Resource” select “Create HTML Embed Form“. This is a page where you will generate HTML code for the Sign-up form.
Do a necessary edits (I prefer label to be on the left side) and copy the generated code.
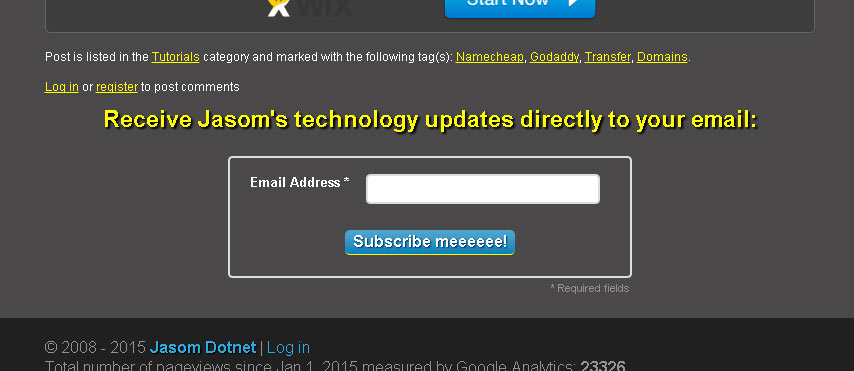
3. Paste copied code into your site source. In my case I placed it between text and comments on the blog post page.
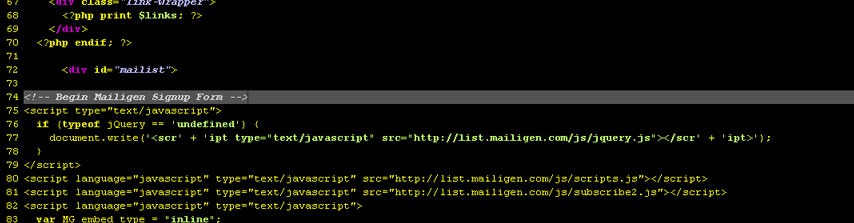
Since it’s a raw HTML it really easy to a custom edits. This is my result:
It’s time to send your first email newsletter
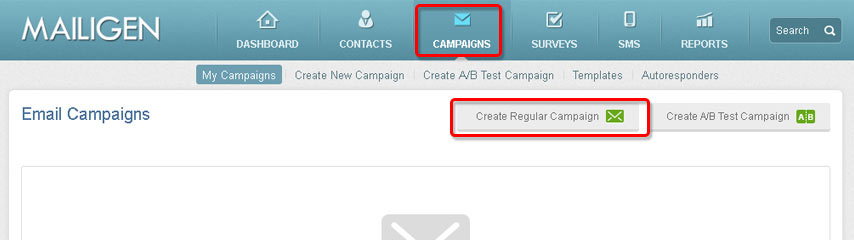
1. Now, when you have collected email addresses, it’s time to send your fist email newsletter. Go to “Campaigns” and click on “Create Regular Campaign” button.
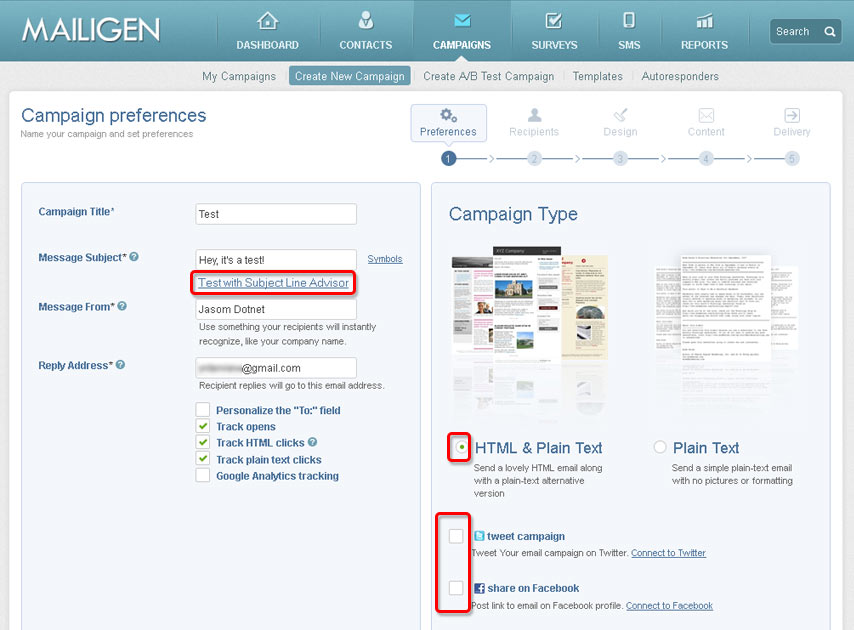
2. Set the basic campaign preferences:
- Campaign Title: Internal name within Mailigen system
- Message Subject. You can optimize this with “Subject Line Advisor” feature (see the step 7).
- Message From: Name which will appear as a sender’s name
- Reply Address: Email address the customer will be able to respond
- Check “Track opens”: If requested, email clients send back notification “email was open”. Open can be alternatively tracked when inserted images were loaded.
- Check “Track HTML clicks”: In HTML email user don’t see the link structure so the link will be changed to a custom tracking link.
- Check “Track plain text clicks”: In plain text emails link structure is visible to the users, so modified (tracking) links may look SPAMmy.
- Google Analytics tracking: You can add to all your links GA tracking suffix
- No idea what “Personalize the ‘To:’ field” means 🙂
- Campaign Type: HTML & Plain Text (it’s the matter of experiment what performs for your audience better; Mailigen has the feature for this: A/B Test Campaign)
- Additionally, there’s an ability to share the campaign within the Social Networks (with followers on Facebook and Twitter)
3. Select a contact list and click on the “next” button.
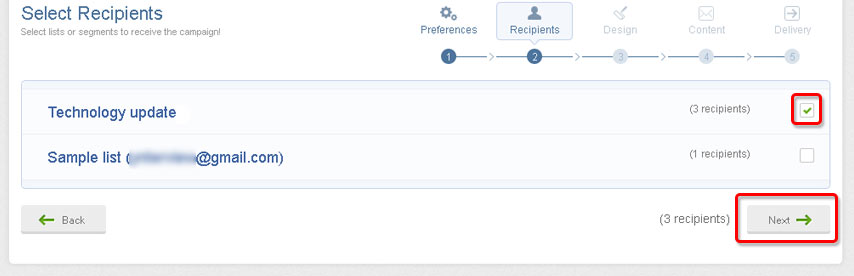
TIP: Here you can verify email addresses on your list before sending your first newsletter if you want high deliverability.
4. This is another Mailigen’s strong part. You can save a lot of time when designing the newsletter and choose preformed template from a rich library.
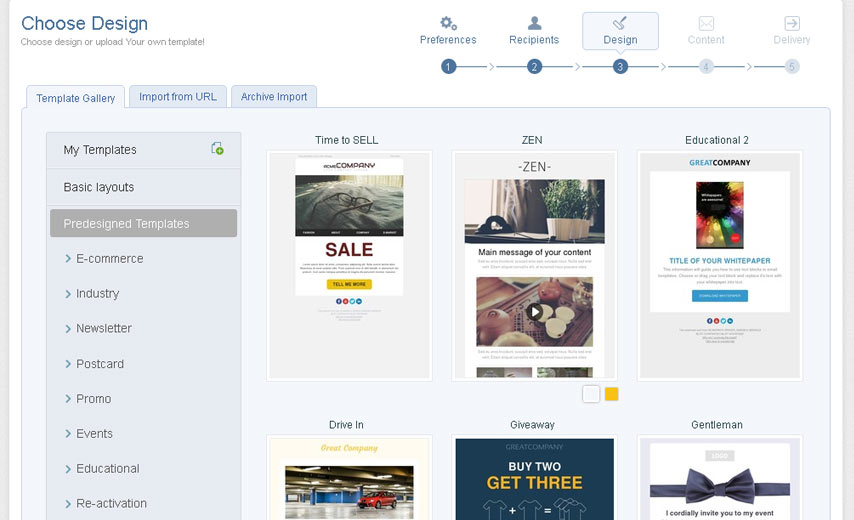
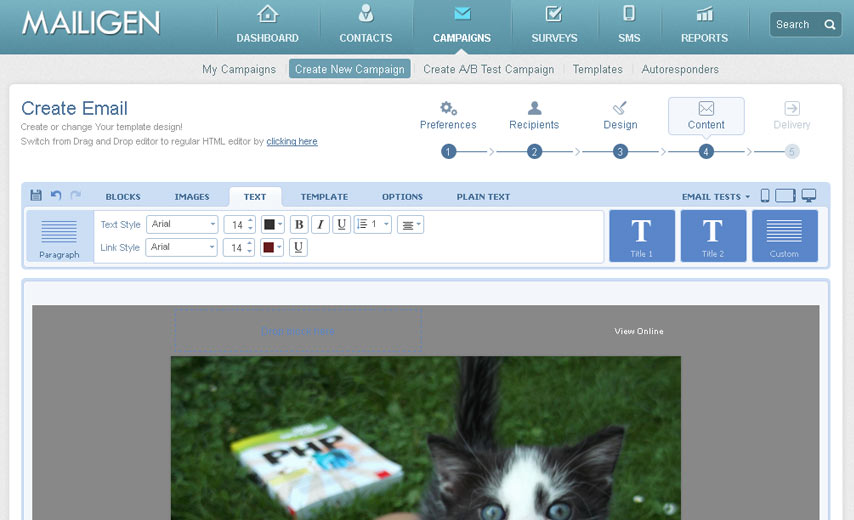
5. Select a design which fits you best and customize it with Drag and drop email editor. Mailigen created several video tutorials which can be very handy in this step. Videos are titled:
- Drag and drop email editor: Overall Video
- Drag and drop email editor: Frames and Blocks
- Drag and drop email editor: Image Manager
- Drag and drop email editor: Social Links and Profiles
When you are done with editing, click on the “next” button at the bottom of the page.
6. In a final step, before the delivery take place, you will see a campaign summary. This is the moment when you schedule delivery time or adjust newsletter subject in order to improve ROI. Click on the “Test with Subject Line Advisor” link.
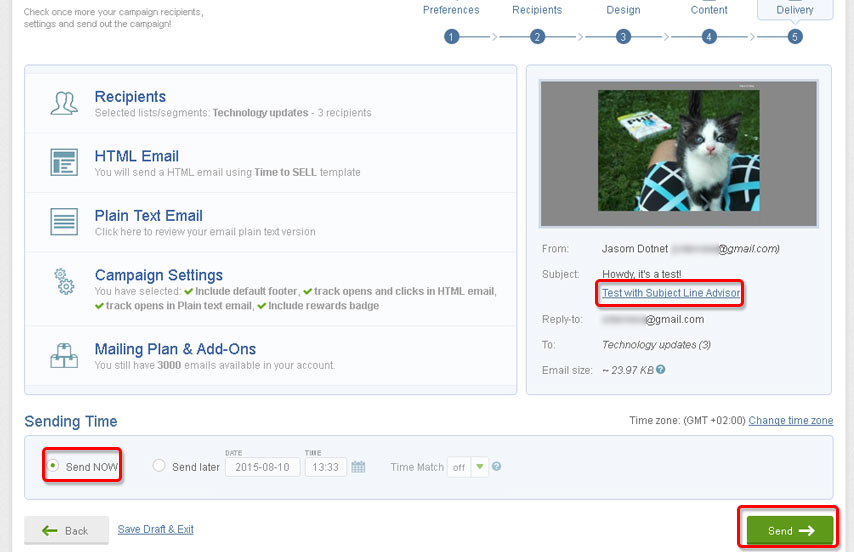
7. You will be redirected to the “Test with Subject Line Advisor” page. My analyzed subject was “Hey, it’s a test!“. Tool claims that subjects with the word “Howdy” instead of “Hey” tends to have a 7% higher open rate.
When done, click on the “return to my campaign” link, edit the subject and click on the “Send” button at the bottom of the page.
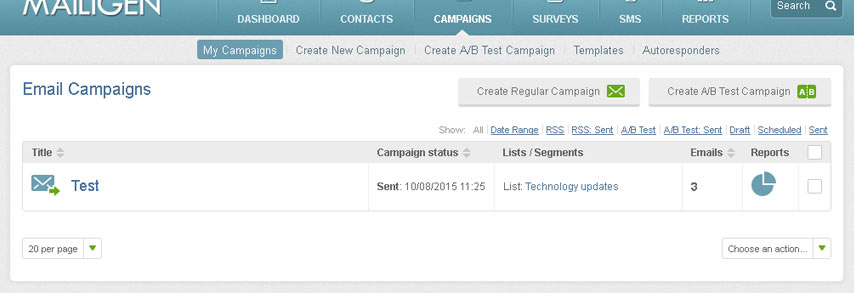
8. That’s it, you have now successfully sent your first email newsletter. Congratulations!
NOTE: Campaign statistics (open-rate, etc.) are available under the pie chart icon.
Email newsletter in conclusion
Email is an important part of every Internet based business. If you are passionate online entrepreneur, you should definitely consider creating your own email newsletter. Don’t waste this opportunity.
Leave a Reply